Campaign Plans – User Documentation
Page Title
Campaign Plans
The Campaign Plans page is the central hub for managing recruitment campaigns within Jobcleek. It allows users to structure hiring requirements, set budgets, and manage internal approvals for recruitment initiatives.
Overview
What is this page used for?
The Campaign Plans page enables recruitment teams to:
- Create and manage recruitment campaigns
- Track campaign status and progress
- Filter and search existing campaigns
- View campaign details and take actions
Who should use it?
- Recruitment Managers
- HR Managers
- Hiring Managers
- Talent Acquisition Teams
- Anyone involved in planning and approving recruitment initiatives
When would users typically access this page?
- When planning a new recruitment drive
- When reviewing active or pending campaigns
- When tracking the status of hiring initiatives
- When managing internal approvals for recruitment budgets
- When searching for specific campaigns by category or status
Navigation Path
Dashboard → Recruitment → Campaign Plans
The breadcrumb navigation at the top of the page shows: Dashboard / Recruitment
Page Layout
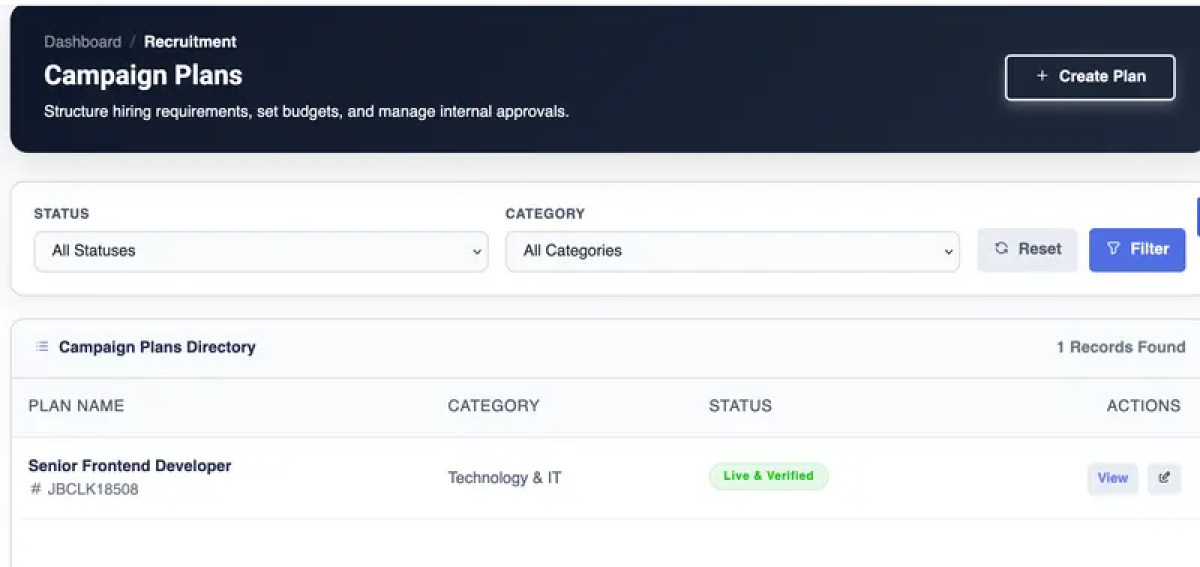
1. Header Section
- Page Title: "Campaign Plans" (large, bold heading)
- Page Description: "Structure hiring requirements, set budgets, and manage internal approvals."
- Breadcrumb Navigation: Shows the current location (Dashboard / Recruitment)
- Create Plan Button: Blue button in the top-right corner for adding new campaigns
2. Filter Section
Located below the header, this section contains:
- STATUS Dropdown: Filter campaigns by their current status
- CATEGORY Dropdown: Filter campaigns by job category
- Reset Button: Clear all applied filters
- Filter Button: Apply selected filter criteria (blue button)
3. Campaign Plans Directory
The main content area displaying:
- Section Heading: "Campaign Plans Directory"
- Record Count: Shows the number of campaigns found (e.g., "1 Records Found")
- Data Table: Displays campaign information in columns
4. Data Table Columns
- PLAN NAME: The campaign name and unique identifier
- CATEGORY: The job category (e.g., Technology & IT)
- STATUS: Current campaign status with color-coded badge
- ACTIONS: Action buttons (View, Edit, etc.)
Step-by-Step Guide
How to View Existing Campaign Plans
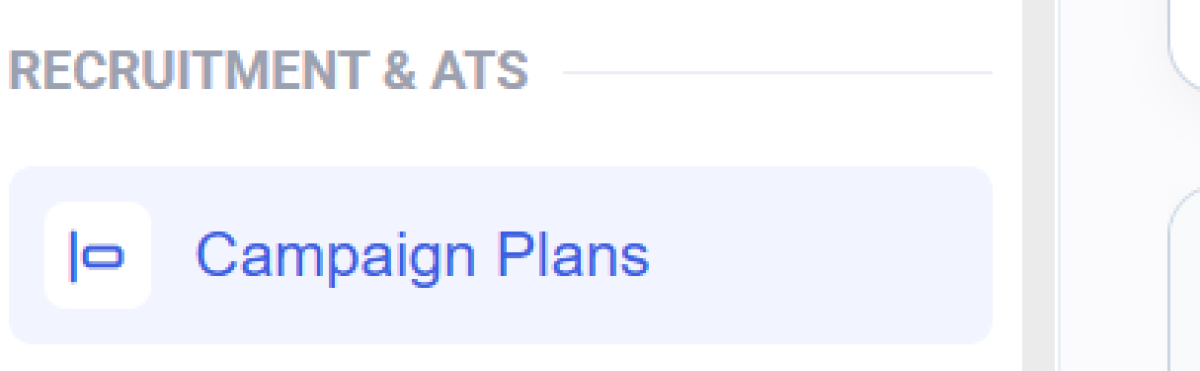
- Navigate to Dashboard → Recruitment → Campaign Plans
- The Campaign Plans Directory will display all available campaigns
- Review the list of campaigns in the table
How to Filter Campaign Plans
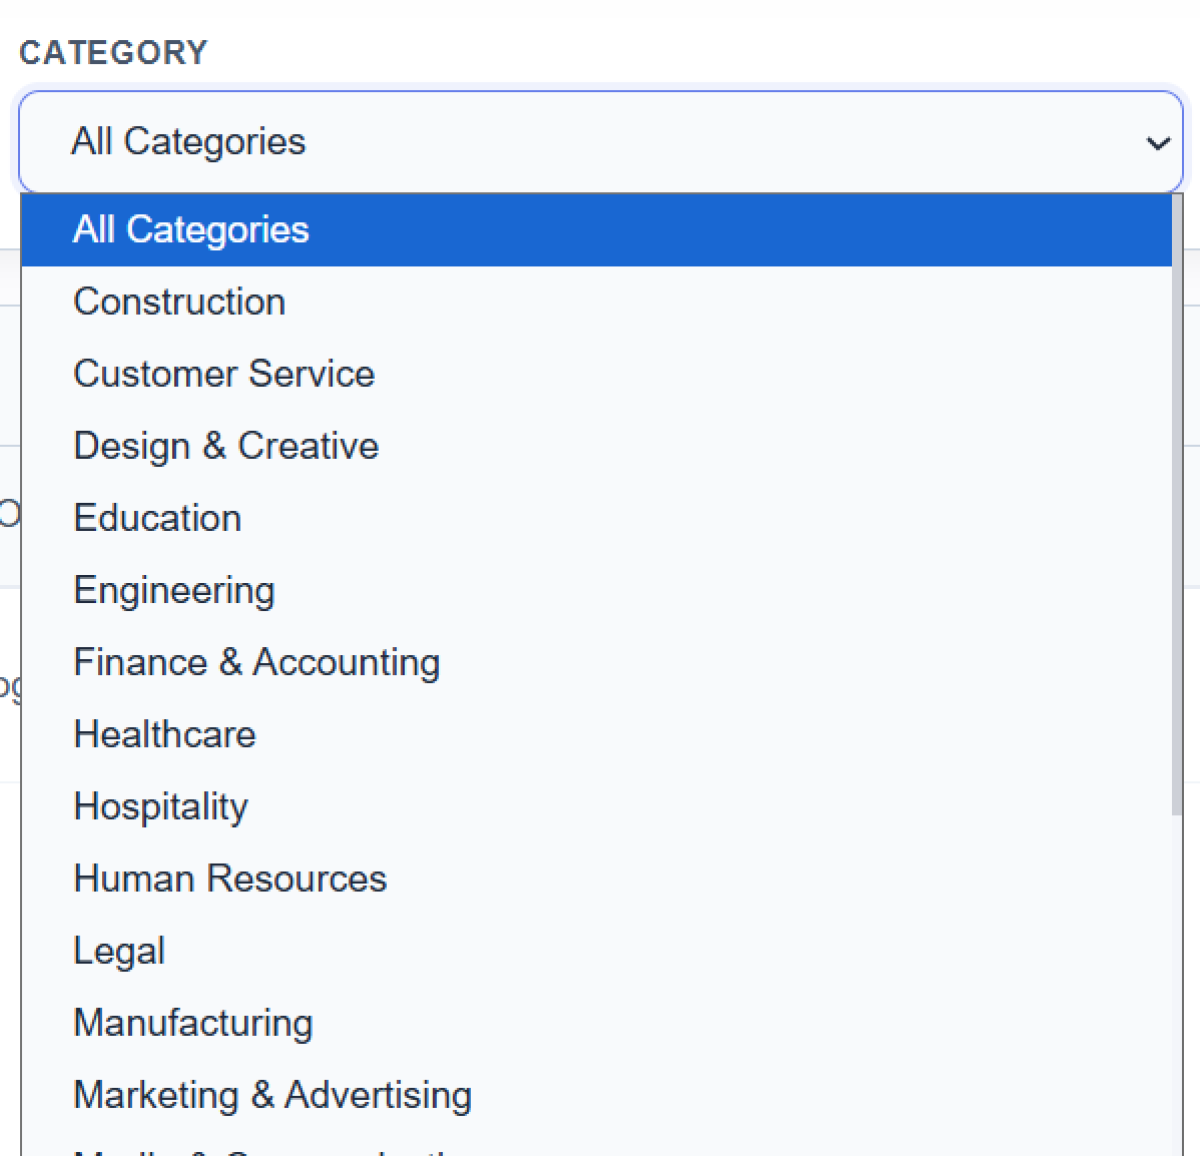
- Click the STATUS dropdown to select a specific status (e.g., Draft, Live & Verified, Closed)
- Click the CATEGORY dropdown to select a job category (e.g., Technology & IT, Healthcare)
- Click the Filter button to apply your selections
- The table will update to show only campaigns matching your criteria
- To clear filters, click the Reset button
How to Create a New Campaign Plan
- Click the + Create Plan button in the top-right corner
- The "Add Campaign Plan" form will open
- Complete all required fields (see Field & Button Reference below)
- Click Save or Submit to create the campaign
How to View Campaign Details
- Locate the campaign in the Campaign Plans Directory table
- Click the View button in the ACTIONS column
- The campaign details page will open
How to Edit a Campaign Plan
- Locate the campaign in the table
- Click the Edit icon (checkmark icon) in the ACTIONS column
- Make your changes in the edit form
- Save your changes
Field & Button Reference

Header Section
|
Element |
Purpose |
Type |
|---|---|---|
|
+ Create Plan |
Opens the form to create a new campaign plan |
Button (Primary Action) |
Filter Section

|
Field/Button |
Purpose |
Required/Optional |
Available Options |
|---|---|---|---|
|
STATUS |
Filter campaigns by their current workflow status |
Optional |
• All Statuses (default)• Draft• Pending Internal Approval• Pending Platform Verification• Live & Verified• Revision Required• Open• Paused• Hold• Closed |
|
CATEGORY |
Filter campaigns by job category |
Optional |
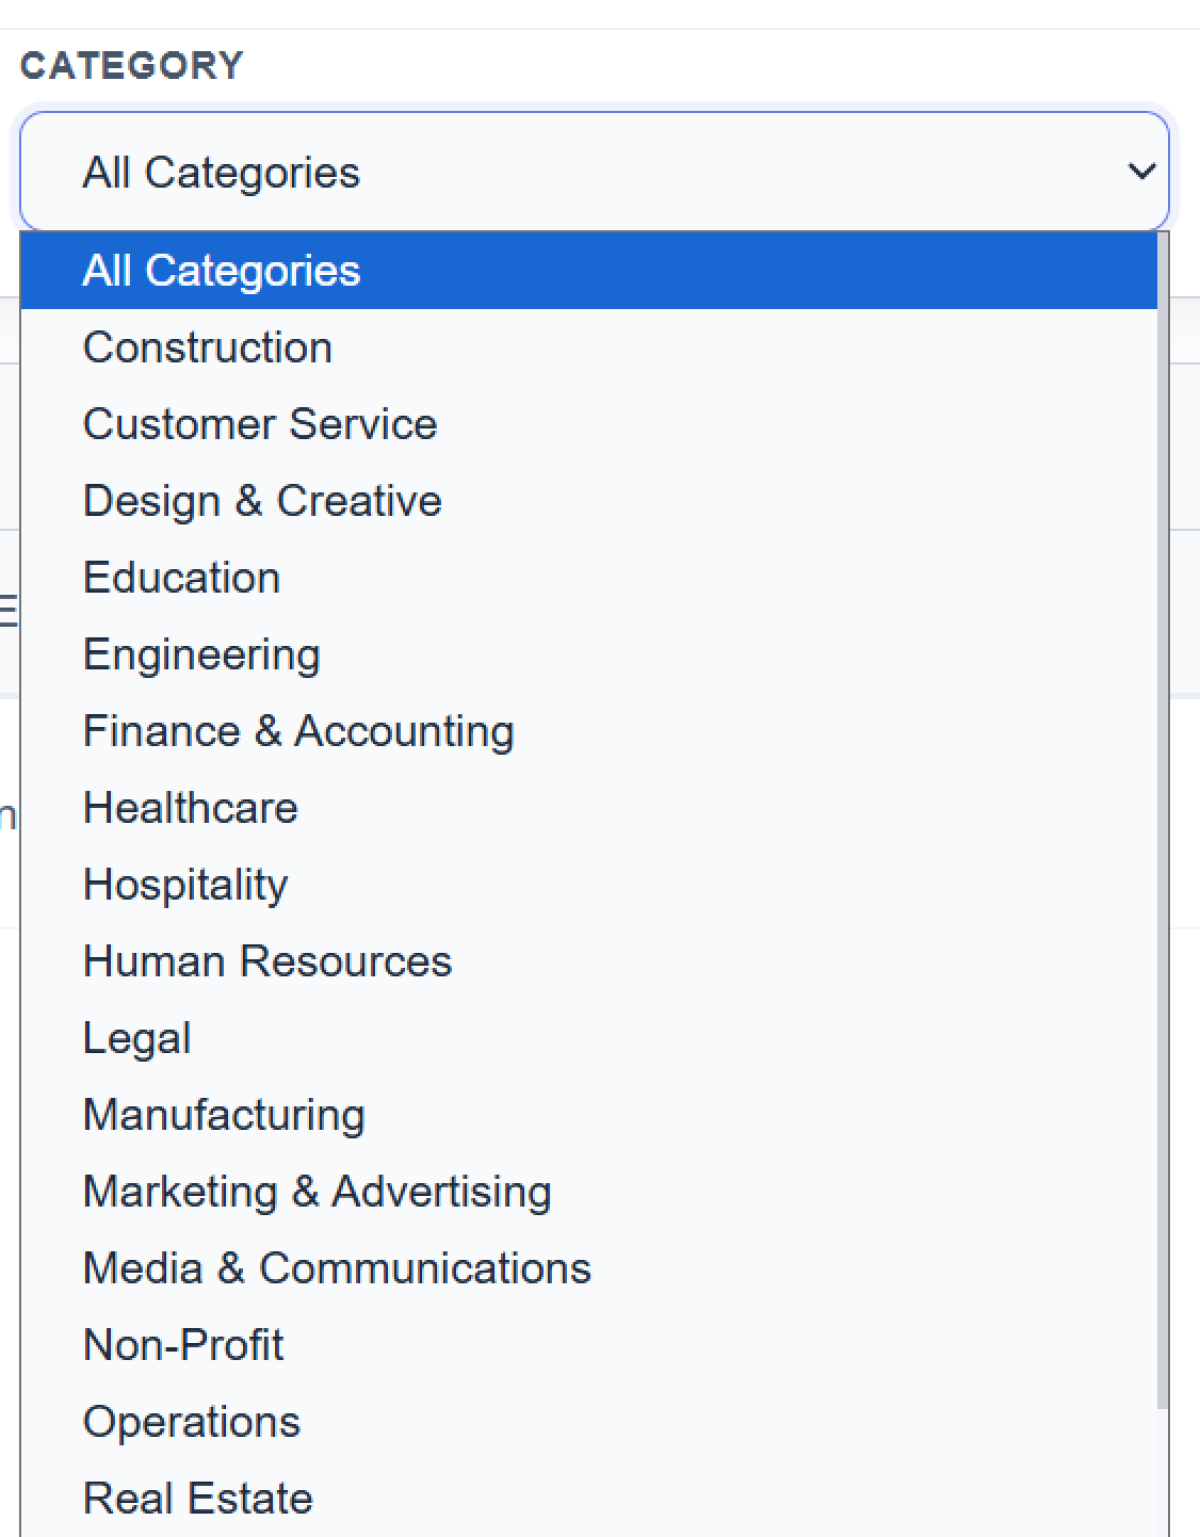
• All Categories (default)• Construction• Customer Service• Design & Creative• Education• Engineering• Finance & Accounting• Healthcare• Hospitality• Human Resources• Legal• Manufacturing• Marketing & Advertising• Media & Communications• Non-Profit• Operations• Real Estate• Retail• Sales(and more) |
|
Reset |
Clears all applied filters and returns to default view |
Optional |
N/A |
|
Filter |
Applies the selected filter criteria to the table |
Optional |
N/A |
Campaign Plans Directory Table
|
Column |
Description |
|---|---|
|
PLAN NAME |
The name of the campaign and its unique identifier (e.g., "Senior Frontend Developer" with ID "JBCAT49308") |
|
CATEGORY |
The job category assigned to the campaign (e.g., "Technology & IT") |
|
STATUS |
Current status of the campaign, displayed as a color-coded badge (e.g., "Live & Verified" in green) |
|
ACTIONS |
Action buttons:• View – Opens campaign details• Edit (checkmark icon) – Opens edit form |
Add Campaign Plan Form
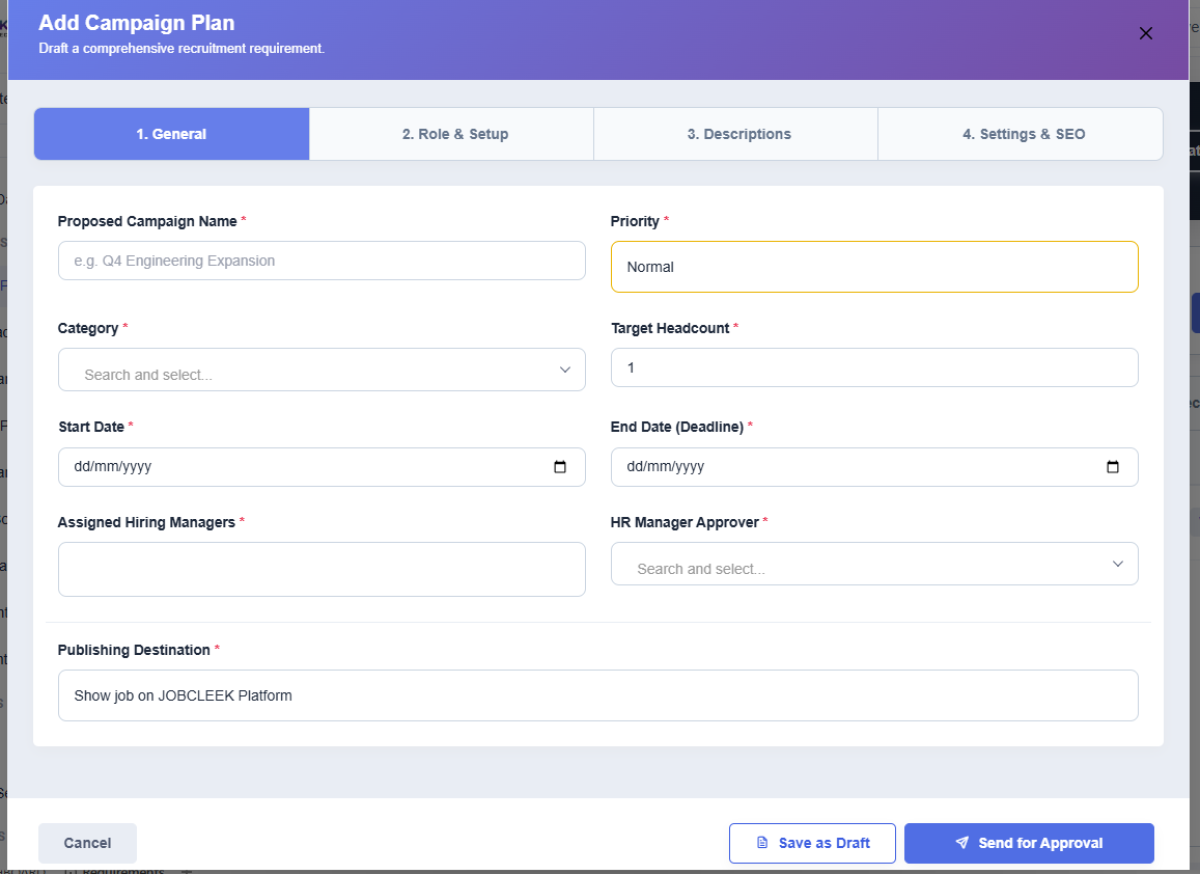
When you click + Create Plan, a multi-step form opens with the following tabs:
Tab 1: General
|
Field |
Purpose |
Required/Optional |
Notes |
|---|---|---|---|
|
Proposed Campaign Name |
Enter a descriptive name for the campaign |
Required (*) |
Example: " Senior Learning Development Manager " |
|
Priority |
Set the urgency level of the campaign |
Required (*) |
Options: Normal, High, Urgent (assumed) |
|
Category |
Select the job category |
Required (*) |
Searchable dropdown with all job categories |
|
Target Headcount |
Enter the number of positions to fill |
Required (*) |
Numeric field |
|
Start Date |
Campaign start date |
Required |
Date picker (dd/mm/yyyy format) |
|
End Date (Deadline) |
Campaign end date |
Required (*) |
Date picker (dd/mm/yyyy format) |
|
Assigned Hiring Managers |
Select the hiring managers responsible |
Required (*) |
Searchable multi-select dropdown |
|
HR Manager Approver |
Select the HR manager who will approve |
Required (*) |
Searchable dropdown |
|
Publishing Destination |
Choose where the campaign will be published |
Required (*) |
Options include "Show job on JOBCLEEK Platform" |
Additional Tabs
The form includes the following additional tabs (content not visible in screenshots):
- Tab 2: Role & Setup – Define job roles and requirements
- Tab 3: Descriptions – Add job descriptions and details
- Tab 4: Settings & SEO – Configure visibility and search optimization
Tips & Best Practices
✅ Use descriptive campaign names – Include the role, department, or time period (e.g., "Senior Learning Development Manager")
✅ Filter before searching – Use STATUS and CATEGORY filters to narrow down large lists quickly
✅ Set realistic deadlines – Ensure End Date allows sufficient time for approvals and hiring
✅ Assign the right approvers – Choose HR Manager Approvers who have authority and availability
✅ Review status regularly – Check campaigns in "Pending Internal Approval" or "Revision Required" status frequently
✅ Use the Reset button – Clear filters between searches to avoid missing campaigns
✅ Check the record count – The "X Records Found" indicator helps confirm your filters are working correctly
Common Mistakes
❌ Forgetting to click the Filter button – Selecting dropdown options alone won't filter the table; you must click Filter
❌ Not clearing old filters – Previous filter selections may hide campaigns you're looking for. Use Reset to start fresh
❌ Confusing "View" and "Edit" – Use View to see details without making changes; use the Edit icon to modify
❌ Leaving required fields blank – All fields marked with an asterisk (*) must be completed before saving
❌ Setting unrealistic target headcounts – Ensure the number matches budget and approval capacity
❌ Choosing the wrong category – Incorrect categorization can affect reporting and candidate matching
Troubleshooting
Problem: No campaigns are showing in the table
Solution:
- Check if filters are applied (STATUS or CATEGORY). Click Reset to clear them
- Verify you have permission to view campaigns
- Confirm that campaigns exist in the system
Problem: The Filter button doesn't seem to work
Solution:
- Ensure you've selected at least one filter option from the dropdowns
- Try clicking Reset first, then reapply your filters
- Refresh the page if the issue persists
Problem: Cannot create a new campaign plan
Solution:
- Verify you have the necessary permissions (Recruitment Manager or HR Manager role)
- Check that all required fields (*) are completed
- Ensure dates are valid (End Date must be after Start Date)
- Contact your system administrator if the + Create Plan button is not visible
Problem: Status badge colors are unclear
Solution:
- Green badges (e.g., "Live & Verified") indicate active, approved campaigns
- Yellow/orange badges typically indicate pending or in-progress statuses
- Red badges may indicate issues or closed campaigns
- Hover over the badge for additional information (if tooltips are enabled)
Problem: Cannot find a specific campaign
Solution:
- Use the STATUS filter to check if the campaign is in a different status than expected
- Try the CATEGORY filter to narrow by job type
- Check if the campaign has been archived or closed
- Verify the campaign name or ID with your team
Related Pages
After working with Campaign Plans, users may need to visit:
- Job Postings – To publish approved campaigns as live job ads
- Candidate Pipeline – To review applicants for active campaigns
- Approval Workflows – To track or expedite pending approvals
- Budget Management – To review or adjust campaign budgets
- Hiring Managers Dashboard – To assign or reassign hiring responsibilities
- Reports & Analytics – To analyze campaign performance and hiring metrics
Important Notes
⚠️ Permissions Required
- Only users with Recruitment Manager, HR Manager, or Hiring Manager roles can create campaign plans
- Viewing permissions may vary based on your organization's settings
⚠️ Approval Workflow
- Campaigns must go through internal approval before becoming "Live & Verified"
- Ensure the correct HR Manager Approver is assigned to avoid delays
⚠️ Data Accuracy
- Campaign data affects downstream processes (job postings, candidate matching, reporting)
- Double-check all fields before saving
⚠️ Status Definitions
- Draft – Campaign is being created but not yet submitted
- Pending Internal Approval – Awaiting HR Manager approval
- Pending Platform Verification – Awaiting system or admin verification
- Live & Verified – Campaign is active and approved
- Revision Required – Changes requested; campaign needs updates
- Open – Campaign is active and accepting applications
- Paused – Temporarily inactive
- Hold – On hold pending decision
- Closed – Campaign has ended
⚠️ Best Practice for Multi-Step Forms
- Complete all tabs (General, Role & Setup, Descriptions, Settings & SEO) before submitting
- Save drafts frequently if the system supports it
- Review all information in a final preview before publishing
Summary
The Campaign Plans page is your central tool for managing recruitment campaigns in Jobcleek. Use it to create, filter, view, and track hiring initiatives from planning through approval and execution. Always ensure accurate data entry, proper approvals, and regular status monitoring to keep your recruitment process running smoothly.
For additional help, contact your system administrator or refer to the Jobcleek Help Center.